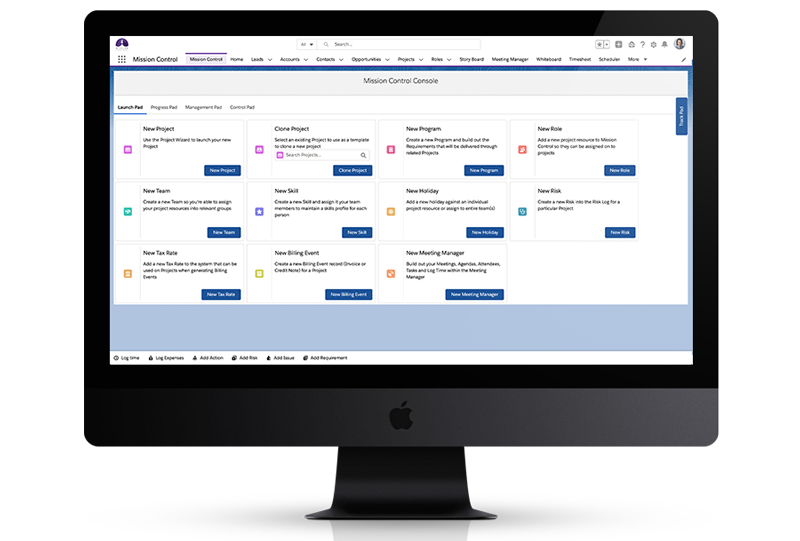
The Console
This is your gateway to the Project Management Command Center that allows quick launch access to any aspect of your project data. The Mission Control Console is broken into four seperate tabs which allow you to perform a variety of actions within the platform.
LAUNCH PAD
The creation station, where you can create new Project Frameworks, Roles, Teams & Skills, Risks & Issues, Billing & Meetings.
PROGRESS PAD
Access your key progress tools including, Kanban Board, Timesheets, Action Pad & Expense, Issue & Risk Log.
MANAGEMENT PAD
Where you’ll find the features to manage your projects, such as the Project Overview, Program Planner, Storyboard, Gantt Chart, Scheduler, PMO Dashboard, Role Utilization Report & Meeting Manager.
CONTROL PAD
Ready access to all your settings including; Daily Digest delivery times, Action Progress, Status Report run time, Default hours per day, PMO red and green breakpoint, Gantt Chart, Kanban & Timesheets, Automation & Billing.
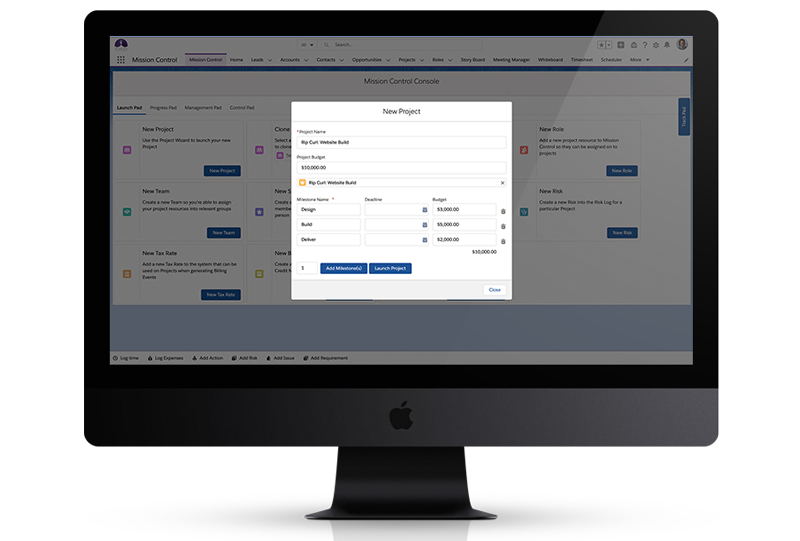
Project Generation
There are a few ways in which you can easily generate a Project with Mission Control, whether you are creating a brand new Project from scratch or wanting to clone similar details from an existing Project.
Launch Pad
Where you can quickly launch a new project framework, including the Project and related Milestones.
Auto-Generation
Automatically generate an entire ‘Project Plan’ from an Opportunity, based on a specified template, or the Products you’ve associated to your Opportunity. The Project Plan can include the Project, Milestones, Actions, Checklist Items, Contributors and Dependencies.
Project Cloning
Clone any existing Project, using it as a template to quickly initiate a new Project.
Project Requests
Users can submit a Project Request, which can be reviewed by the PM team, and can be used to subsequently auto-generate a Project from a defined template.
Project Overview
The Kanban Whiteboard provides users with a great way of visualising all of their actions, based on their current status. From here you can:
- Progress Actions
- Filter on Projects
- Log Time / Track Time
- Collaborate via Chatter Feed
- Manage Action Checklists
- Re-assign Ownership
- Edit / Add Actions & Contributors
It’s a great way of quickly reviewing priorities with the team!
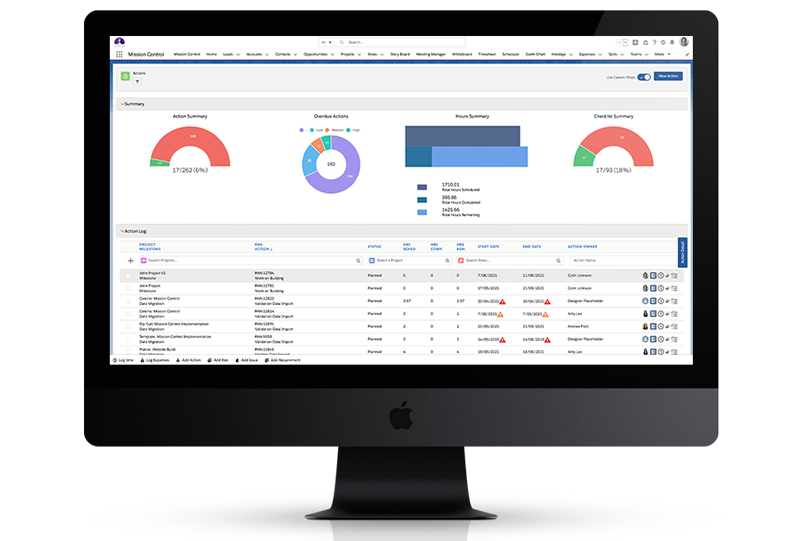
Action Pad
A place where resources can see a list of all the Actions assigned to them. A series of analytical charts provide a summary insight into the current status. This is accessible as a stand-alone page, which you can access via the ‘Progress Pad’ on the Mission Control Console, as well as a sub-tab on the Project Overview page.
The detail section provides a list of all Actions, where you can log time and mark as complete. The work-pad enables a detailed view of the Action, opportunity to collaborate via Chatter and manage User Stories & Checklist Items.
- Create new Actions
- View a summary of your Actions
- View overdue Actions
- Insight into hours spent across lifetime of Project
- Filter the Actions log based on projects
- View all recent Actions and status
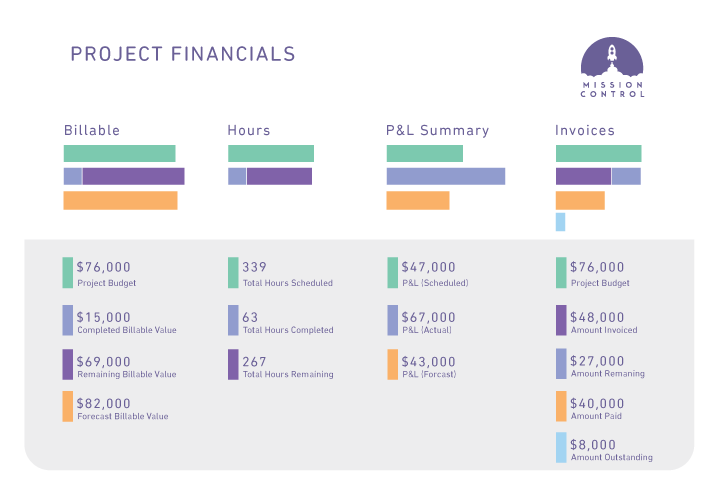
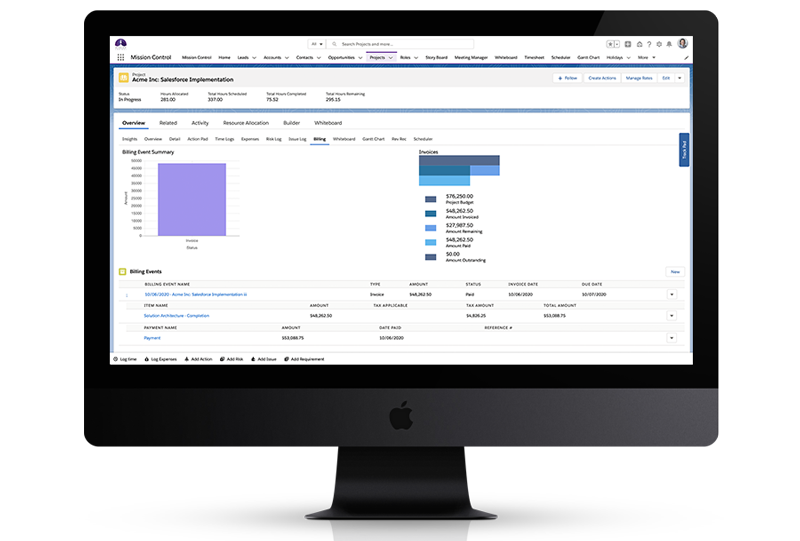
Project Financials
Track both Billing and Cost Rates on your Projects via three main methods of calculation:
Standard
All Roles charged at the same Billing Rate / Cost Rate
Role Based
Each Role charged at their
own individual Billing
Rate / Cost Rate
Skill Based
Each Role charged at the
Billing Rate / Cost Rate
specified against their Role for
the appropriate Skill
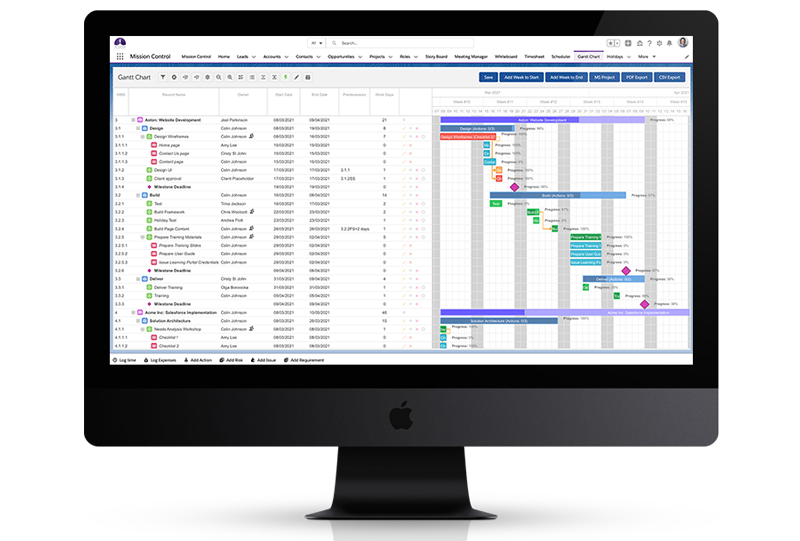
Gantt Chart
One of our hero features that enables you to visualize the entire project timeline, including all your Actions and Milestones with interactive functionality. This is a key place where you can not only keep track of your projects progress but adjust and manage elements of your project, including:
- Reschedule delivery dates by drag and drop
- Create dependencies
- View Critical Path
- Compare actual vs. baseline dates
- Export to MS Project / PDF
- Export data table to CSV
- Create additional Milestones, Actions or Checklist items
- Edit Projects, Milestones, Actions or Checklist items
- Adjust lead and lag
- View & create WBS and Predecessors
- Hover box tooltips
- Milestone sort order
- View and reset baseline dates vs actual
- Display custom fields
- Auto scheduling
- Inline editing
- Hide unnecessary detail for client versions
- Timeframe scale from weeks to months to years
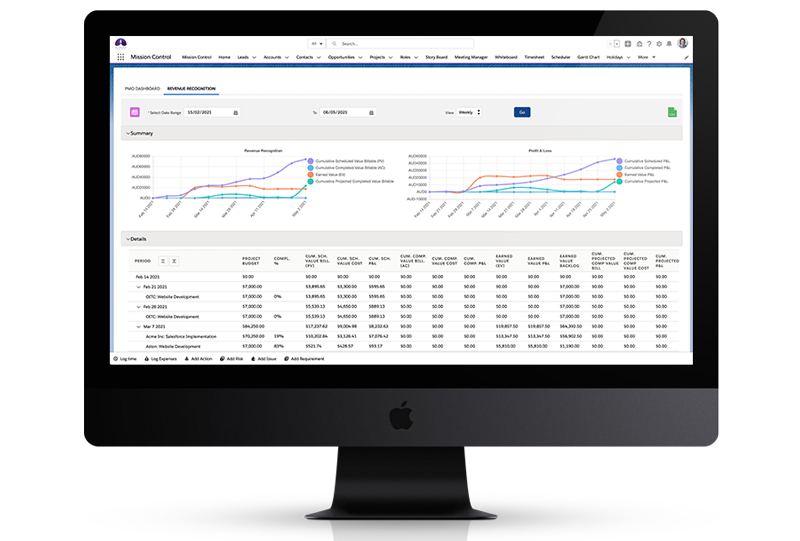
Revenue Recognition
Reveals insight into the realization of the revenue across the duration of the Project, based on the schedule you have in place. View your scheduled revenue and cost, actual revenue and cost, Earned Value and projected revenue and cost.
-
Header
* Choose your analysis period by date
* Choose to view by week or month
* Export the data to a CSV -
Summary
* View analytic charts
* Insight into cumulative Scheduled Value Billable
* Insight into cumulative Completed Value Billable
* View Earned Value
* Cumulative Projected Completed Value Billable
* View profit & loss -
Detail
* Financial data for each period / project
* Collapse to view a high level summary of the data
* Expand to view a detail summary of the data
Timesheets
Provides resources the ability to log time to all pre-loaded Actions that have been assigned that week and refer back to previous weeks to keep track of hours. There are three tabs that the resource can access, Timesheets, Calendar Converter and Approvals.
The Calendar Converter provides an alternative way to log time by dragging and dropping from your calendar and Approvals is to manage the Approvals process.
Within the Timesheets feature a user can;
- Log time against Actions
- Edit previously logged time
- Keep track of weekly hours vs. targets,
- Convert Salesforce Events to Time Logs
- Approve team Timesheet submissions
- Make comments against time logged
- Access Chatter feed
- Access Checklist items against Actions
- Save and submit Timesheet
- Quick search Actions
- Customise Timesheet settings

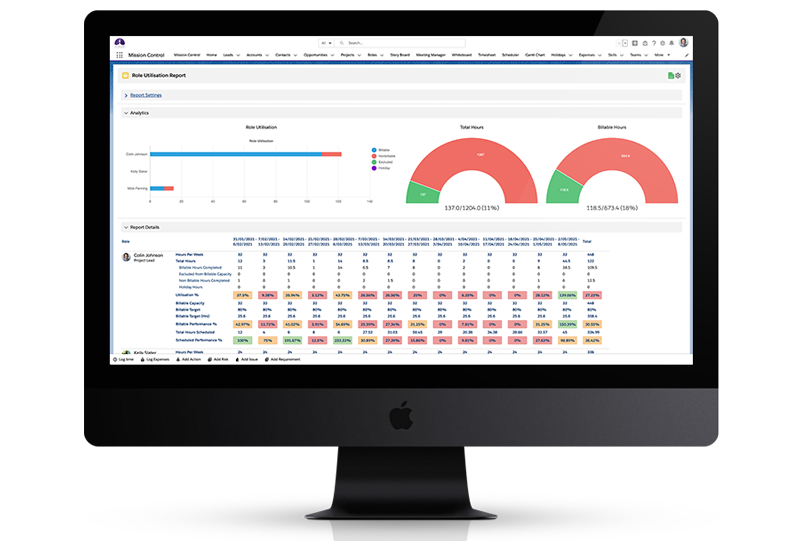
Role Utilization
Allows you to see how each resource is performing. Compare actual vs estimated hourly workload.
You can access the Role Utilization Report from the ‘Management Pad’ of the Console. It can also be added to the main navigation menu.
The individual figures on the report include:
Hours per Week – How many hours the resource is meant to work per week
Total Hours – A sum of all hours logged for that week, including Billable, Excluded from Billable Capacity, Non-Billable and Holidays
Billable Hours Completed – Sum of all Billable hours logged for that week
Non Billable Hours Completed – Sum of all Non-Billable hours logged for that week
Holiday Hours – Sum of all Holiday hours taken that week
Utilization % – Formula calculating ‘Total Hours’ / ‘Hours per Week’
Billable Capacity – Formula calculating ‘Hours per Week’
Billable Target % – The field from the Role record that specifies the Billable Target %
Billable Target (Hrs) – Formula calculating ‘Billable Capacity’ * ‘Billable Target %’
Billable Performance % – Formula calculating ‘Billable Target (Hrs)’ / ‘Billable Capacity’
Total Hours Scheduled – A sum of all hours scheduled for that week
Scheduled Performance % – Formula calculating ‘Total Hours’ / ‘Total Hours Scheduled’
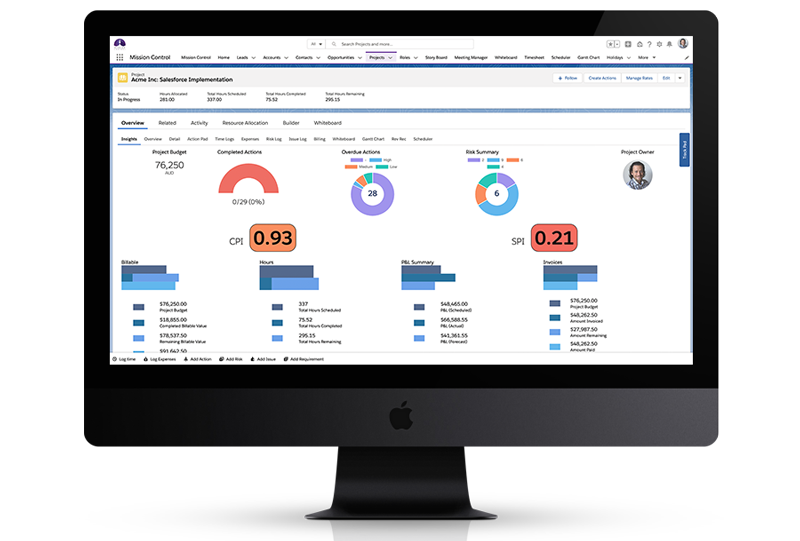
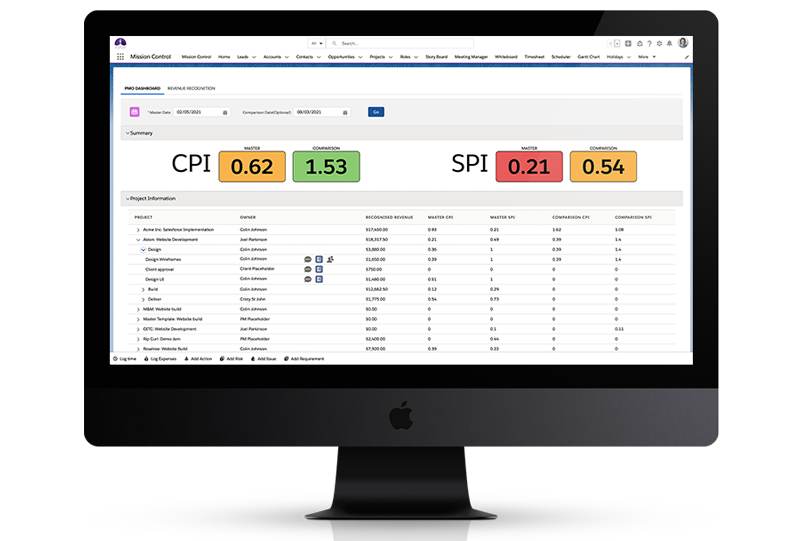
PMO Dashboard
High-level insight into how Projects are performing to budget and schedule. The PMO Dashboard provides you with the ability to establish a variety of key performance indicators relating to your projects for a quick view indication of how well the Project is progressing, including:
Planned Value – The percentage of ‘Hours Scheduled – Billable’ accounted for, from the Action ‘Start Date’ to the end of that week
Earned Value – Calculated based on the ‘Completion %’ multiplied by the ‘Hours Scheduled Value (Billable)’.
Actual Cost – The sum of the ‘Hours Completed Value (Billable)’ on the Time Logs.
Recognized Revenue – This calculates how much of the revenue is due to be earned has been recognised so far.
CPI – This indicator identifies how the Project, Milestone or Action is performing against the scheduled revenue.
SPI – This identifies how the Project, Milestone or Action is performing against the scheduled time line. The higher the score, the better the performance
CPI / SPI Breakpoints – The CPI and SPI values will be coloured red, amber or green based on the breakpoints you have set.
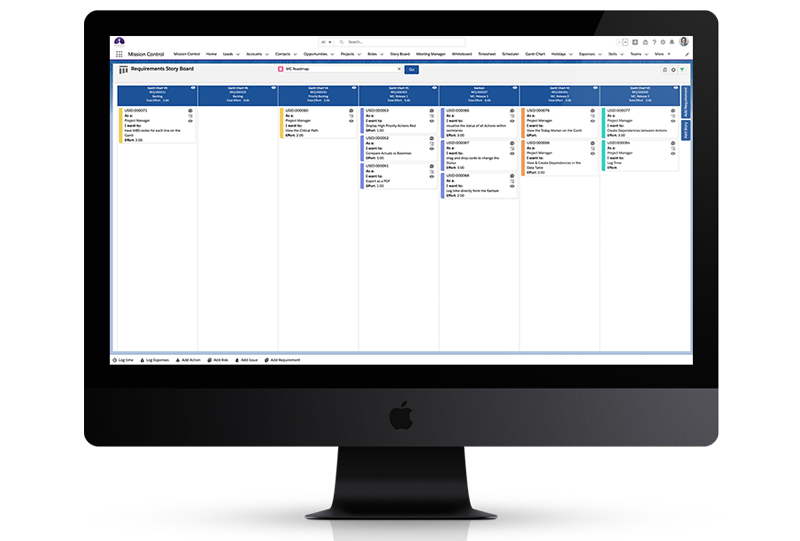
Story Board
The Story Board allows you to build out and map your User Stories to the appropriate Requirement within a Program. To access this feature go to the Management Pad in the Mission Control Console, and within the Story Board tile, search and select the required Program and click the ‘View Story Board’ button.
When you initially load the Story Board, you will be required to apply a Filter, to load in the Requirements & User Stories relevant to your Project.
You’re able to use the Story Board to:
- Create new Requirements
- Create new User Stories
- Edit / Delete Requirements
- Edit / Delete User Stories
- Reparent User Stories between Requirements
- Collaborate on Chatter
- Create Checklist Items related to User Stories
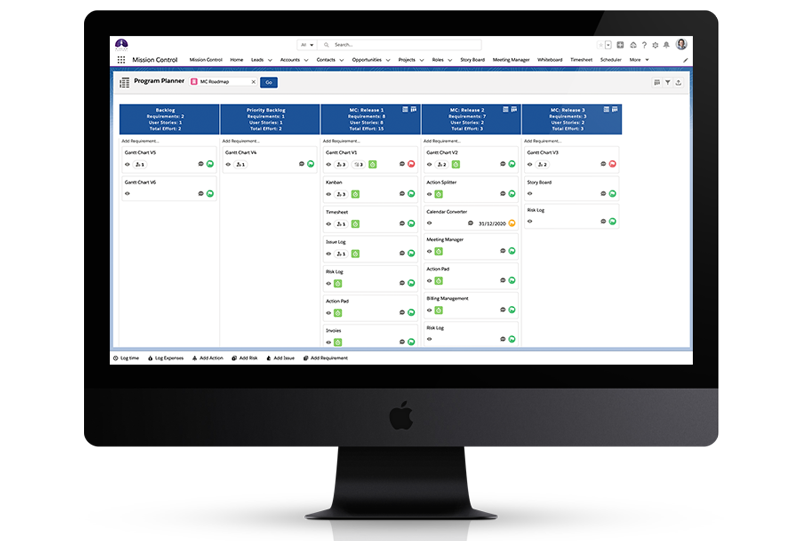
Program Planner
A Kanban-style board that enables you to build out your Requirements, User Stories and Checklist Items to be delivered as part of a long-term roadmap across a series of Projects. Manage roadmaps, assigning Requirements within the Program to individual Projects for delivery.
The Program Planner can be used to manage the higher-level requirements for a program of works that will be delivered across a number of related Projects. To utilize this feature you need to create a ‘Program’ from within the Mission Control console, you can then access this from the Management Pad.
There are a number of tasks the Program Planner enables you to do, including:
- Create Requirements
- Edit Requirements
- Add User Stories
- Add Checklist Items
- Add Projects
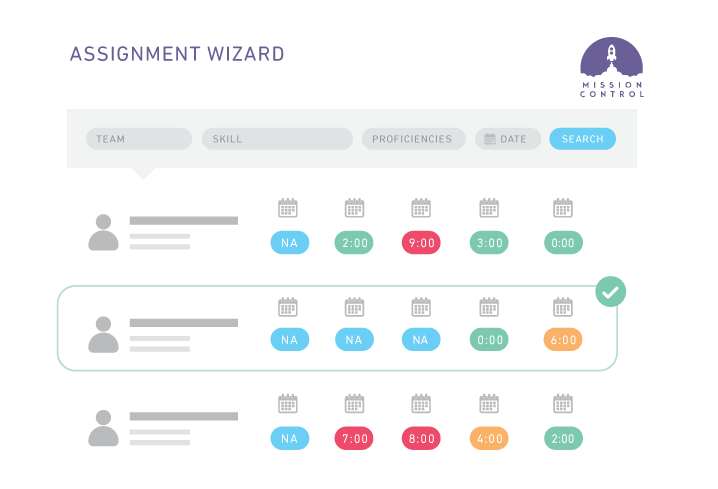
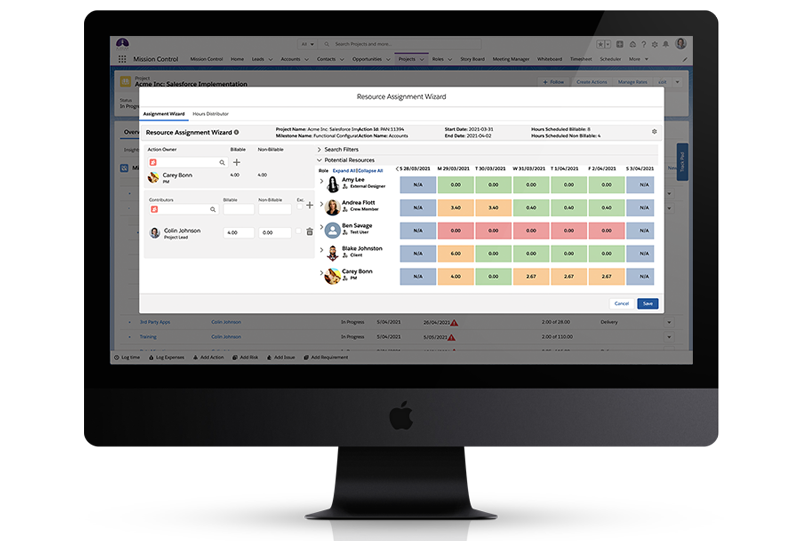
Assignment Wizard
A unique feature that allows you to easily add Contributors when creating your Actions so that you can manage the resourcing amongst the team.
The Wizard gives you insight into the availability and Skill sets of your Roles so that you can best decide which Roles to utilise as Contributors and as the Action Owner.
Within this feature you can:
- Search based on team membership, skill set & proficiency
- View insight into capacity
- View upcoming holidays
- Identify & allocate the most appropriate resources
- Distribute hours over a number of days
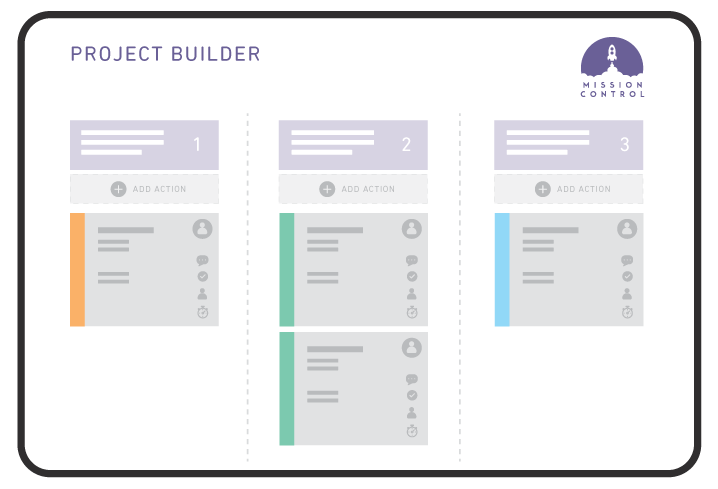
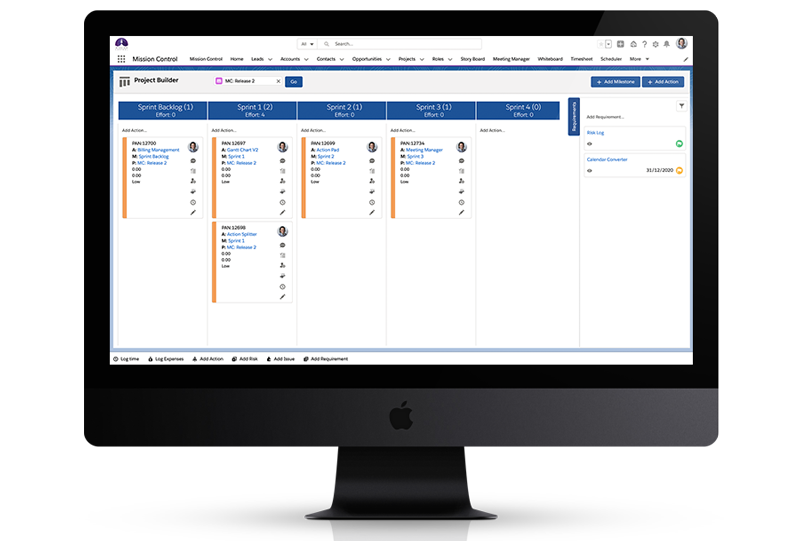
Project Builder
This feature assists with building the detail of a Project where you can input all the necessary data across your Project, Milestones, Requirements and Actions. It also allows you to convert your Requirements and User Stories into Actions within a Project.
Within the Project Builder you’re able to:
- Add Milestones
- Add Actions
- Add Requirements
- Convert Requirements to Actions
- Access Roles across the Project
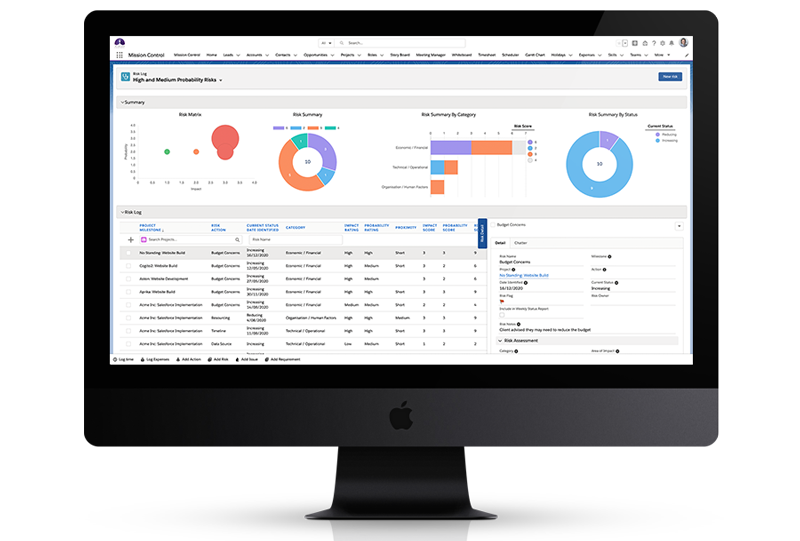
Risks & Issues
Proactively identify and manage potential Risks that could materialize to impact Projects. Assess your Risks against probability and impact on the Risk Matrix.
This feature provides the ability to promote Risks to an Issue, where they will be automatically transferred across to the Issue Log. The Risk Log is accessible as a stand-alone page, which you can access via the ‘Progress Pad’ on the Mission Control Console as well as a sub-tab on the Project Overview page.
Within the Risk Log you can:
- Create new Risks
- View your Risk Matrix
- View the Risk Score Summary
- View Risks by Category and Status
- Sort Risks by any column
- Set Risks to Closed
- View / Edit Risks
- Collaborate via Chatter
- Promote Risks to Issues
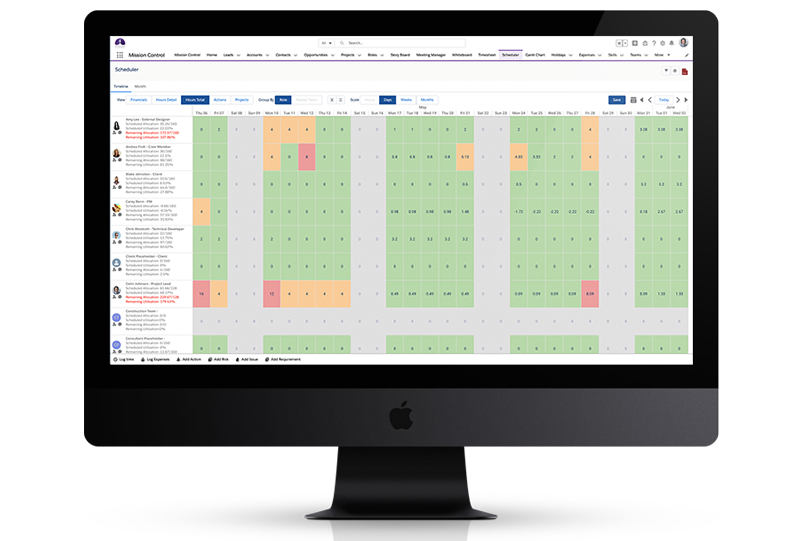
Resource Scheduler
The Scheduler provides a calendar style view of Action records and is an excellent resource capacity planning tool. It helps identify which resources have availability vs those that are bottlenecked due to over-allocation and provides insight into capacity across any duration, from 1 day to 52 weeks.
You can also search for resources based on team membership, skill set and proficiency, and reassign work where appropriate.
- Filter actions by Projects, Teams, Skills, Actions or Roles
- Colour Coding of Weekends, Holidays and Actions
- Drag and drop functionality
- Hours allocation
- Utilization percentage
- Hours view to show each Roles hours scheduled per day
- Action hover views which show key Action information
- Quick access to Action detail
- Ability to set Projects, Milestones or Actions to be excluded from the Scheduler
- Optimized for use on tablets
- Ability to view between 1 and 52 weeks at one time.
- Ability to view standard Salesforce Task and Event records
- Collapsible settings section
- Export to PDF
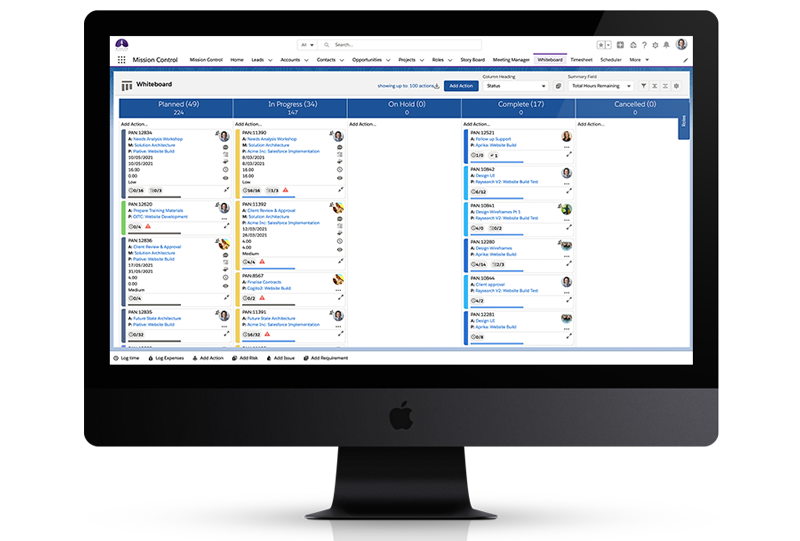
Kanban Whiteboard
An essential feature that displays all the Actions from the project under status value as if they were stuck to a board in the office. This is a popular feature for project managers using Agile methodologies.
Each Action card contains critical information including;
- Action owner
- Action Name
- Milestone Name
- Project Name
- Start date
- End date
- Scheduled hours
- Completed hours
This feature is easily accessed across a range of tabs across Mission Control and within it you can;
- Drag to update Action Status
- Collaborate via Chatter
- Access Checklist Items
- Access Issues
- Log Time
- Add / Edit Actions
- Reassign ownership
- Sort Action order
- Filter Actions
- Collapse / expand Actions
- Create / edit column headers
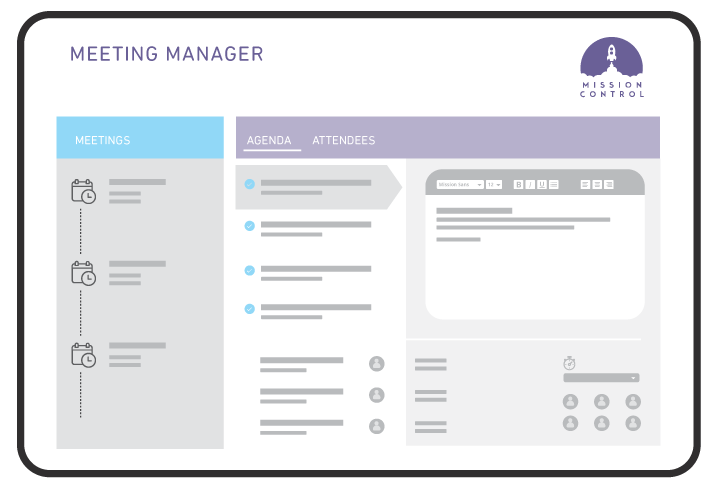
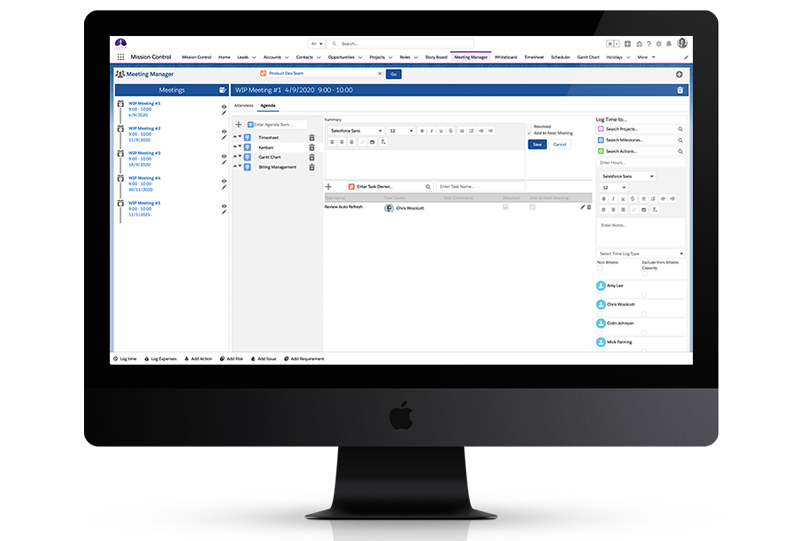
Meeting Manager
A great productivity tool, your project teams can keep on top of all their meetings, agenda items and tasks within the Meeting Manager. Whether that’s project specific, program specific or as a team, across a number pieces of work, you’ll be able to record the meetings, who attended, what was discussed, what was resolved and what is still outstanding.
This feature comprises of the following components:
- Page: Meeting Manager
- Custom Object: Meeting Manager
- Custom Object: Meeting
- Custom Object: Attendee
- Custom Object: Agenda Item
- Custom Object: Agenda Task
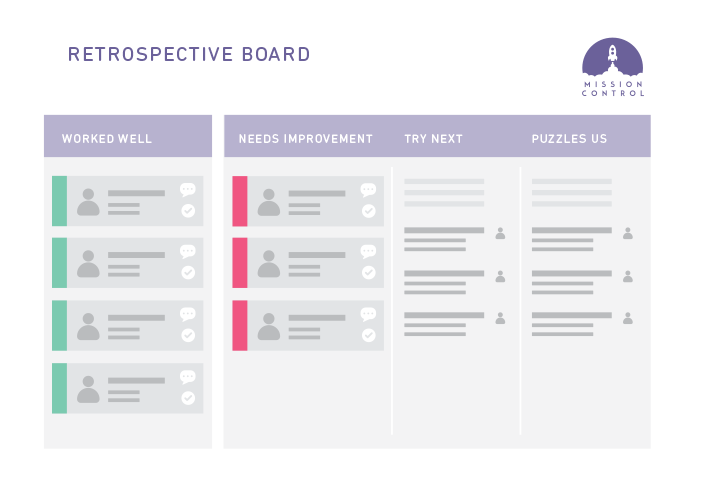
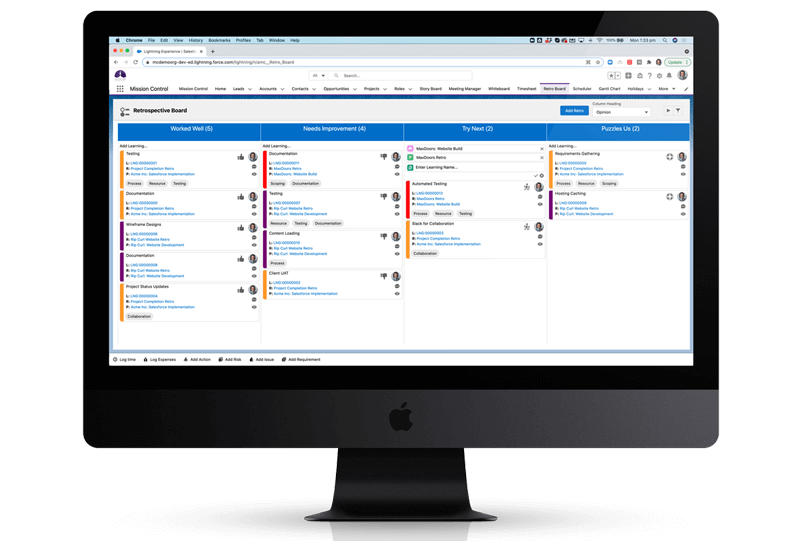
Retrospective Board
An important part of any Project is reviewing how it went, and identifying learnings that can be taken into future Projects. Mission Control’s Retrospective Board enables you to carry out a ‘lessons learned’ assessment of a Project, or even a Phase/Sprint within a Project.
For each Learning, you can indicate your opinion as to whether it was something that worked well that you can take into future projects, or perhaps it didn’t go so well and you may choose to try something else next time round.
Within the Retrospective Board a user can:
-
Create a new Retrospective
-
Create and identify lessons learned
-
Rank the impact of the learning
-
Tag the learning against a category
-
Search learnings and apply learning filters
-
Run Retrospectives during or at a project’s conclusion
-
Use the Kanban Board to display learnings
-
Collaborate interactively with multiple projects team members
-
Develop learning cards
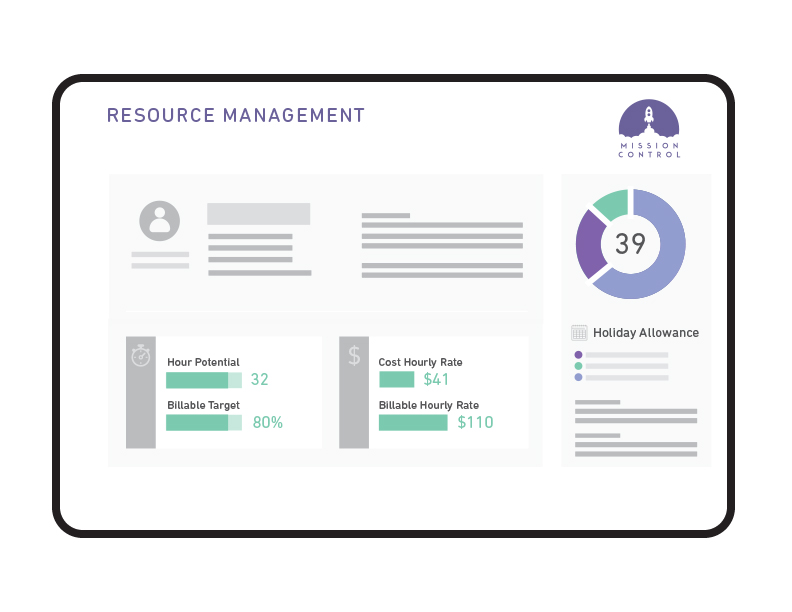
Resource Management
Resource management is the practice of planning, scheduling, and allocating people, money, and technology to a project or program. Mission Control has a range of features in this space that allow you to keep an eye on project stakeholders.
This feature comprises of the following components:
-
Tracking Billing and Cost Rates
Mission Control allows you to track the revenue and costs of a Project. This enables you to track the Profit & Loss for individual Actions, Milestones and Projects. -
Build up a Skills Matrix and track Skill Proficiencies
The Matrix of Skill Proficiencies allows you to identify the most suitable resource for your needs. Although, it might not always be the first person who comes to mind. This is a great tool for bringing those quiet performers to the forefront and putting them on the radar to a wider project network. -
Assign resources to teams
You can use features like Assignment Wizard to search for the right resources based on capacity, team membership, skill set and skill proficiency. -
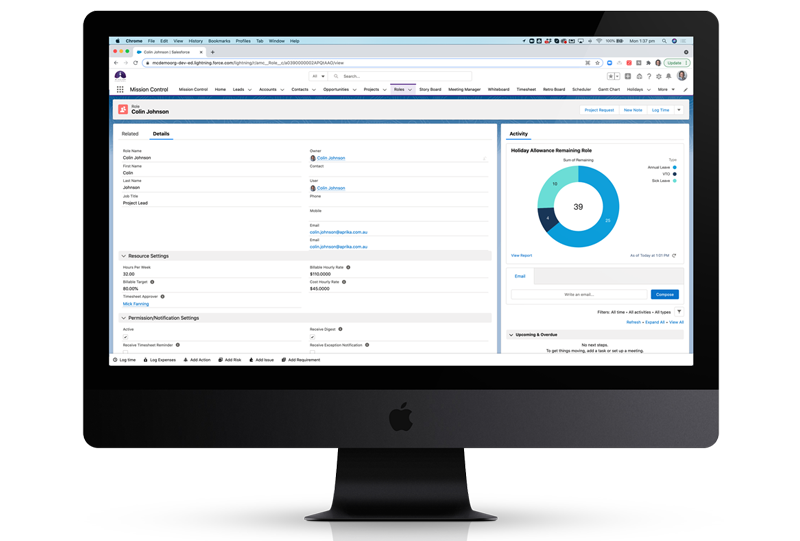
Holiday Management
The Holiday Allowance Object allows you to define how many days are allocated to each Role over a period. This way you can keep track of your staff, and re-allocate as required, as they take leave throughout the project period.