Salesforce Project Management Software by Aprika
Mission Control Version 1.62 Release Notification
14 October 2022
A new version of Mission Control (version 1.62) will be released on the AppExchange on Friday 14th October 2022. This notification has been issued to existing Mission Control users. It contains an overview of the new features available with this release, along with instructions on how to upgrade to the new version.
This release includes a number of new features, along with some enhancements to existing functionality, including:
Let’s get stuck into the detail…
Back in March ’22 we launched the Resource Forecasting functionality as a beta release. As part of Version 1.62, this functionality is now considered Generally Available (GA). We would like to thank all customers that actively tested this functionality during the beta release. Your feedback and input has proven invaluable in bringing this into the solution as a GA feature.
A new Billing Type has been included for customers to manage an invoicing scenario that was not supported by existing Billing Types. To take advantage of this feature, you will need to add ‘Deposit to T&M’ as a new Picklist value in the Billing Type field on the Project Object.
The ‘Deposit to T&M’ Billing Type enables customers to manually raise deposit invoices and once that amount has been used, T&M invoices will be generated periodically. To use this Billing Type, the following fields will need to be set on the Project:
Billing Type: Deposit to T&M
Billing Cycle: Periodic
Periodic Billing Frequency: Set to your preference
Periodic Billing Next Date: Set to your required date
Deposit Invoices
To create a Deposit Invoice, you will need to manually create the Billing Event and Billing Event Item records. The ‘Deposit’ field on the Billing Event will need to be set to TRUE in order to be recognised as a Deposit Invoice.
Note: You can have multiple Billing Events marked as a Deposit for 1 Project. However, Billing Events that have the Deposit field set to TRUE can only have 1 related Billing Event Item.
T&M Invoices
The T&M Invoices that are created as part of the ‘Deposit to T&M’ Billing Type will be created automatically as part of the periodic billing process that is scheduled via the Control Pad of the Mission Control Console.
When users log Expenses against the Project and/or log Time against the Actions on the Project, if there is sufficient balance on the amount that has been invoiced as part of a ‘Deposit’ Billing Event, then the Time Log or Expense will be related to the existing Billing Event and marked as Invoiced. Once there is no balance remaining on the Billing Event, any subsequent Time Logs or Expenses will be invoiced as part of the periodic T&M schedule.
Expenses
When an Expense is created and is related to a Project using the ‘Deposit to T&M’ Billing Type, the following calculation is performed to determine if the Expense can be related to the Deposit Invoice or if it should be flagged to be invoiced in the next periodic T&M Invoice.
Billing Event ‘Amount’ – (‘Hours Completed Value (Billable)’ of all related Time Logs + ‘Amount Claimed’ of all related Expenses) = Balance Remaining
Based on the above ‘Balance Remaining’ formula, one of the following actions will be carried out.
Time Logs
When a Time Log is created and is related to an Action on a Project using the ‘Deposit to T&M’ Billing Type, the following calculation is performed to determine if the Time Log can be related to the Deposit Invoice, if it should be split between the Deposit Invoice and the next periodic T&M Invoice, or if it should be flagged to be invoiced in the next periodic T&M Invoice.
Billing Event ‘Amount’ – (‘Hours Completed Value (Billable)’ of all related Time Logs + ‘Amount Claimed’ of all related Expenses) = Balance Remaining
Based on the above ‘Balance Remaining’ formula, one of the following actions will be carried out.
Note: Expenses will not be split across multiple Billing Events. However, Time Logs can be split to ensure the full amount of the Deposit Invoiced is used.
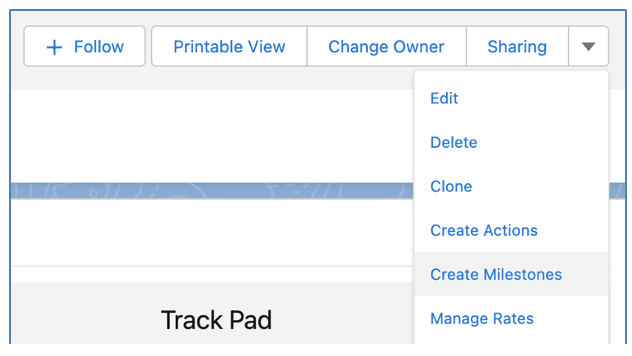
The ‘Create Milestones’ page is accessible from the Project Page Layout. You access it by clicking the ‘Create Milestones’ button, as highlighted below.
This page enables you to quickly create multiple Milestones for one Project. You are able to edit existing Milestones if you need to make changes in bulk.
When you initially load the Create Milestones page, you’ll have one draft record ready to complete, as illustrated below.
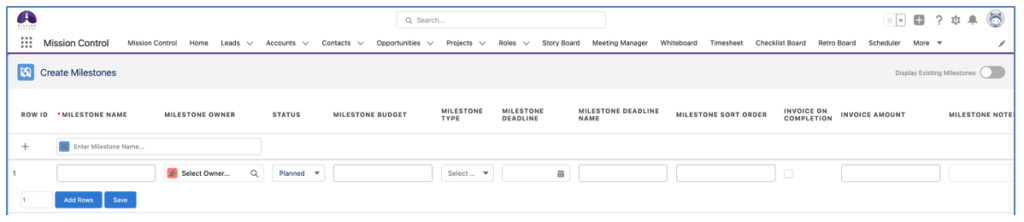
You can add multiple draft rows by entering the number of rows you wish to add and click the ‘Add Row(s)’ button.
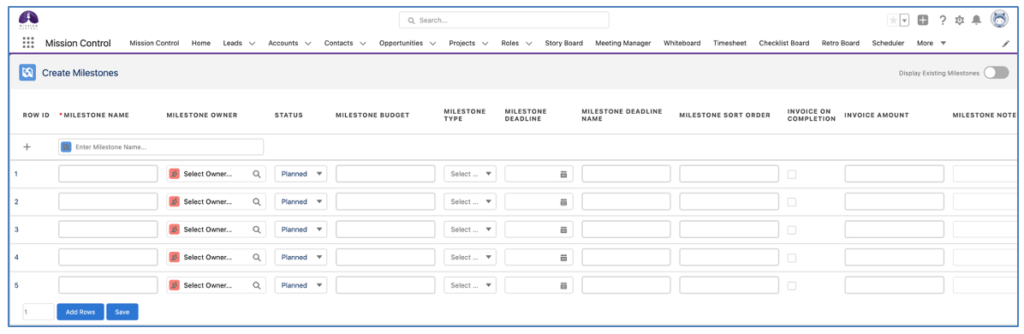
Alternatively, you can use the ‘Quick Add’ feature at the top of the page, which will add the new Milestone to the bottom of the list.
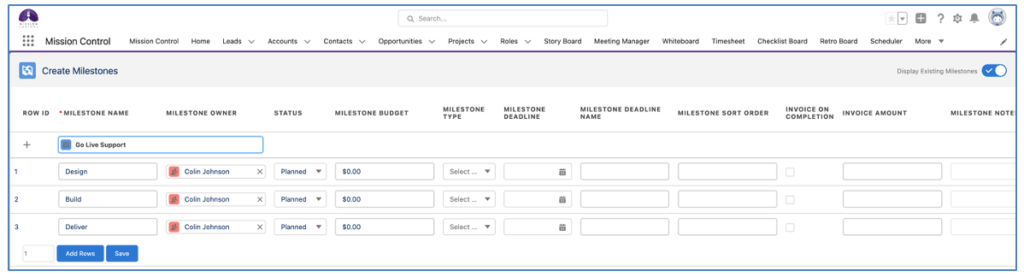
Once you have completed the required information for all of the Milestones, click the Save button at the bottom of the page.
In the top right corner of the page, you can toggle on/off the ability to view and edit Existing Milestones. Is this is toggled on, all existing Milestones related to the Project will be displayed to enable you to make changes as required.

Note: The maximum number of Milestones supported is 100. When editing existing records from the ‘Create Milestones’ page if there are too many Milestones that causes this limit to be exceeded, you will need to edit the Milestones individually.
To provide customers with the ability to choose which fields are displayed on the page, there is a Field Set on the Milestone Object called ‘Create Milestone Fields’. All existing fields on the Milestone Object are available for selection, excluding the following:
These fields are excluded from the Field Set as they will always appear on the Create Milestones page by default.
The following fields are pre-selected within the Field Set and will be accessible from the Create Milestones page.
If you wish to add Custom Fields or remove any of the above pre-selected fields, you can do so by editing the fields included within the Field Set.
The Time Log Decimal Rounding feature enables customers to choose whether the ‘Hours Completed’ field value on the Time Log is rounded to the nearest specified decimal.
This feature is controlled by a setting within the Project Automation Settings section of the Control Pad on the Mission Control Console.

To enable this feature, set the Checkbox field to TRUE and select a value in the picklist to identify your preferred decimal rounding setting. The rounding options are:
The table below provides examples of each of these settings being applied to a Time Log.
| Setting | Original Value | New Value | Reason for New value |
| .00 Down | 1.13 | 1.00 | Rounded down to the nearest .00 |
| .00 Up | 1.13 | 2.00 | Rounded up to the nearest .00 |
| 0.25 | 1.13 | 1.25 | Rounded up to the nearest .25 |
| 0.50 | 1.13 | 1.50 | Rounded up to the nearest .50 |
| .00 Down | 2.67 | 2.00 | Rounded down to the nearest .00 |
| .00 Up | 2.67 | 3.00 | Rounded up to the nearest .00 |
| 0.25 | 2.67 | 2.75 | Rounded up to the nearest .25 |
| 0.50 | 2.67 | 3.00 | Rounded up to the nearest .50 |
| .00 Down | 3.81 | 3.00 | Rounded down to the nearest .00 |
| .00 Up | 3.81 | 4.00 | Rounded up to the nearest .00 |
| 0.25 | 3.81 | 4.00 | Rounded up to the nearest .25 |
| 0.50 | 3.81 | 4.00 | Rounded up to the nearest .50 |
Previously, when a Contributor was assigned to an Action their involvement would span the entire duration of the Action based on the Action’s Start Date and End Date. The Contributor Object now has its own Start Date and End Date fields, enabling you to specify the period of time individual Contributors will be assigned to work on an Action.
If you have a need to assign a Contributor to a specific date range within the Action’s Start Date and End Date period, you can set the Start Date and End Date on individual Contributor records.
By default, if you leave the Contributor Start Date and End Date fields empty, the system will assume the Contributor is being assigned to the Action for the entire duration based on the Action’s Start Date and End Date. In the example below, Colin is the Action Owner and Chris is a Contributor. The Action spans 5 days, and Chris’ Contributor record has no values in the Start Date and End Date fields. Therefore, he is assigned to the entire duration of the Action.

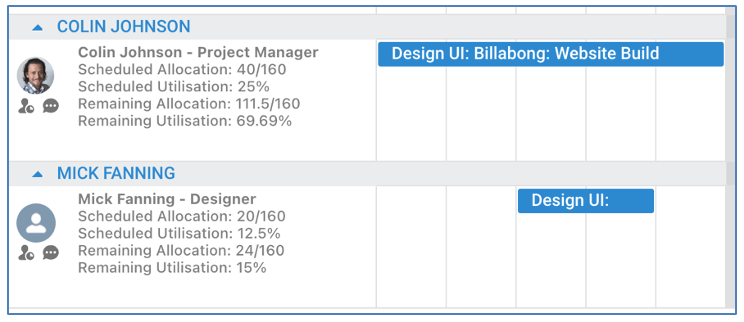
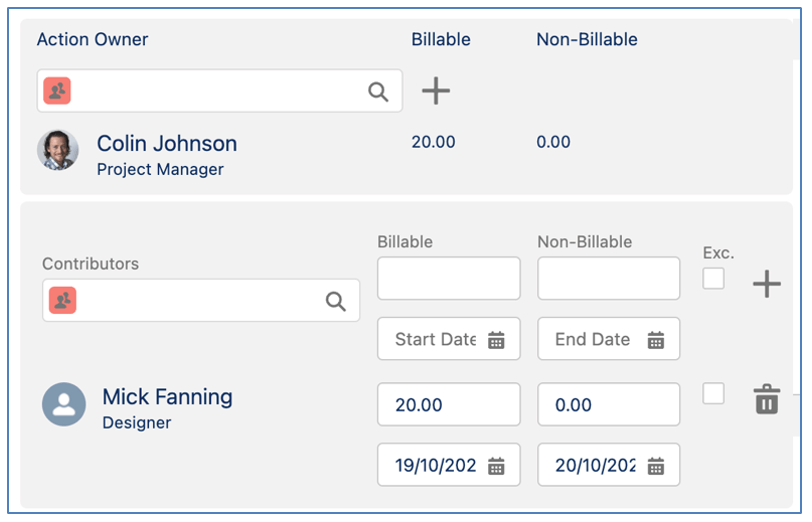
In the example below, whilst Colin as the Action Owner, will be working on the Design UI Action for the entire week, Mick is only required as a Contributor for 2 days. Therefore, the Start Date and End Date on Mick’s Contributor record have been set.
To set the Start Date and End Date of individual Contributor records, you will need to set the ‘Include Contributor Dates’ setting to TRUE within the Resource Assignment Wizard (RAW) Settings, as shown below.
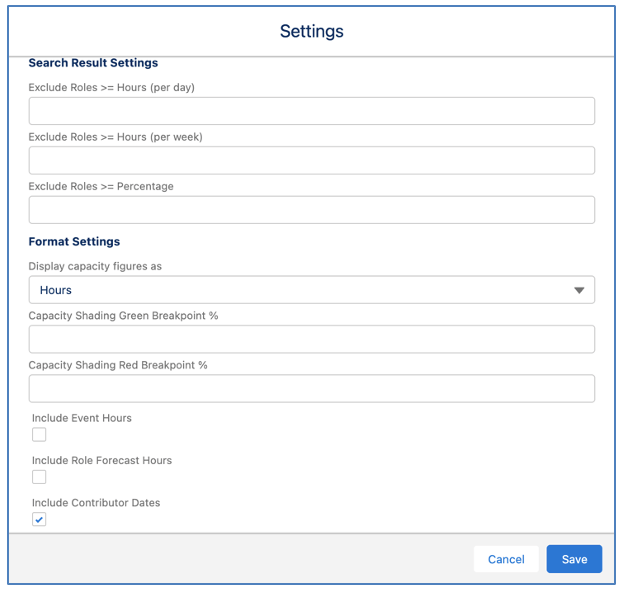
With this setting TRUE, the Start Date and End Date fields for each individual Contributor will be available within the RAW for you to specify manually as required.
Dates are only required if you wish to control when a Contributor is assigned to an Action. If they are being assigned to the Action for the entire duration, the Contributor Start Date and End Date fields can be left empty.
A Validation Rule is included on the Contributor Object to ensure the Start Date and End Date of the Contributor fall within the Start Date and End Date range of the Action.
NOTE: If you have enabled the Role Allocation Automation Settings, you will need to ensure the Start Date and End Date on the Contributor are included in the Object’s Field History Tracking to ensure the batch processes continue to operate.
We received various requests from customers to adjust the 3 x 3 Risk Matrix to be a 5 x 5 Matrix instead. To accommodate this request, both the Probability and Impact fields now have five options.
Previously, the values within these two fields included:
Both fields now comprise of the following five values:
This provides a Risk Score scale of 1-25. Below is an outline of how the Risk Score is calculated.
| Impact | |||||||
| Probability | Rating | Very High | High | Medium | Low | Very Low | |
| Score | 5 | 4 | 3 | 2 | 1 | ||
| Very High | 5 | 25 | 20 | 15 | 10 | 5 | |
| High | 4 | 20 | 16 | 12 | 8 | 4 | |
| Medium | 3 | 15 | 12 | 9 | 6 | 3 | |
| Low | 2 | 10 | 8 | 6 | 4 | 2 | |
| Very Low | 1 | 5 | 4 | 3 | 2 | 1 | |
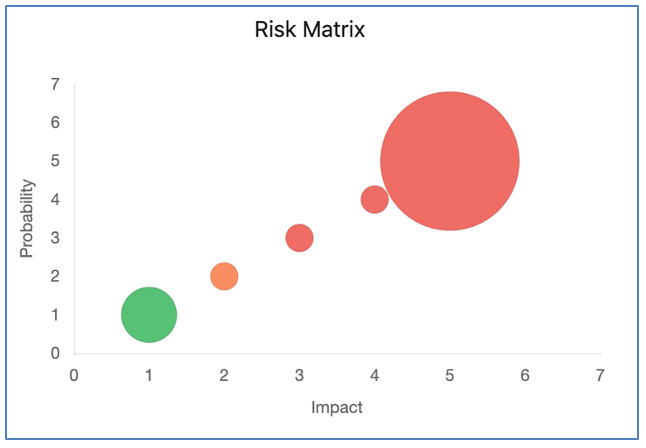
The Risk Matrix chart will display the Risk Score based on the 5 x 5 matrix, as shown below.
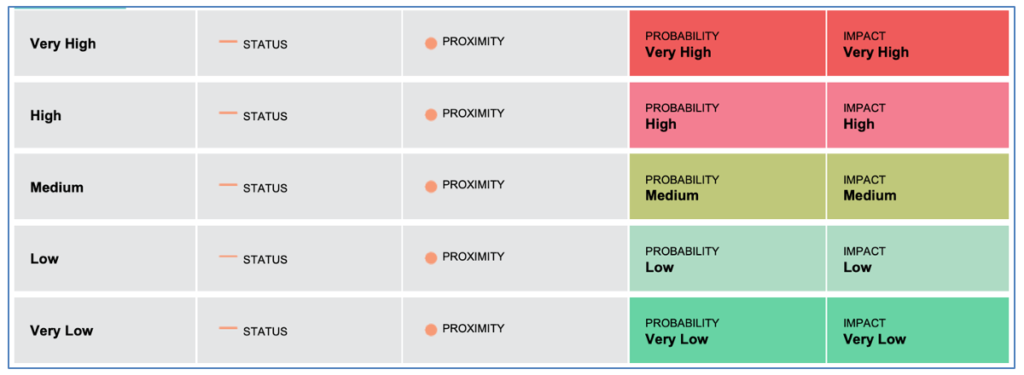
The Risk page of the Project Status Report will display the Probability / Impact colours as illustrated below.
A number of enhancements have been made to the Retro Board, each of which is detailed below.
By default the ‘Opinion’ field on the Learning Object includes the following picklist values:
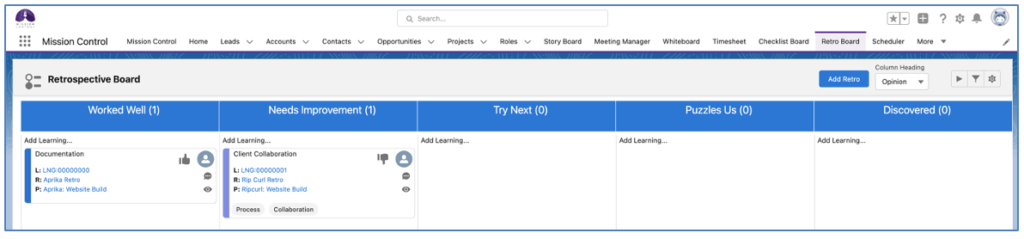
If you add additional values to this field, they will now be available as columns on the Retro Board, as shown below where a new value of ‘Discovered’ has been included:
The Filters on the Retro Board now include the ability to apply up to 2 x Custom Field Filters.
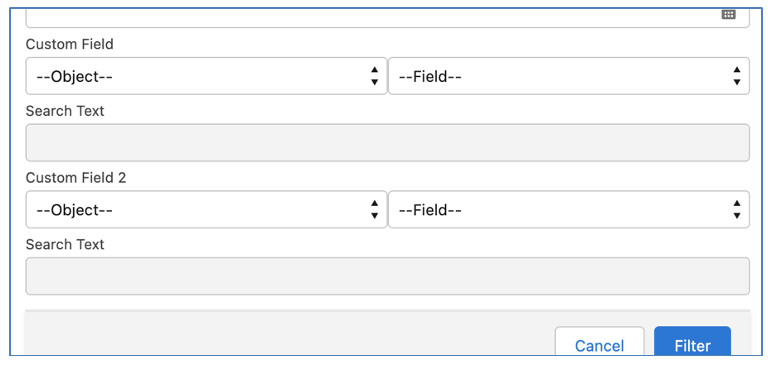
You can apply filters based on Custom Fields from the following Objects:
The filter logic between the two fields is AND.
You are able to include up to 5 x Custom Fields to be displayed on the Learning Card. These fields can be selected within the Settings section of the Retro Board.
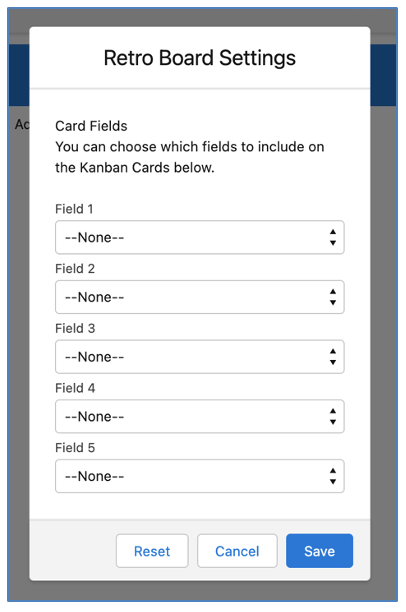
If you have set any Custom Fields to be displayed, they will appear between the Project name and the Category Pills.

To remove any Custom Fields from the Learning Card, you will need to open the Settings Modal and click the Reset button.
A number of enhancements have been made to the Timesheet. Each enhancement is detailed below.
If the parent Action’s ‘Exclude from Timesheet Indicator’ field is TRUE, then the Contributor’s ‘Exclude from Timesheet Indicator’ field will also be TRUE.
However, if the Action field is FALSE, it will appear on the Timesheet for all Contributors. Therefore, you can exclude Actions from appearing on the Timesheet for individual Contributors by setting the ‘Exclude from Timesheet’ field to TRUE directly on the Contributor record.
Quick navigation buttons have been added to either side of the Date field on the Timesheet, as shown below.

These buttons enable you to quickly navigate forwards / backwards by 1 week at a time, instead of having to select a date and clicking the Go button.
The ‘Time Log Summary Modal’ is accessible by clicking the ‘eye’ icon on the Timesheet. By default it shows the following field information:

To provide customers with the ability to choose which fields are displayed on the Modal, a Field Set is available on the Time Log Object called ‘Timesheet – Time Log Summary Fields’. The following fields are selected by default:
If you wish to add Custom Fields or remove any of the above pre-selected fields, you can do so by editing the fields included within the Field Set.
When entering a new Time Log on the Timesheet, you are able to open the ‘Time Log Information’ Modal to enter additional information, such as Time Log Notes, Time Log Type, etc.
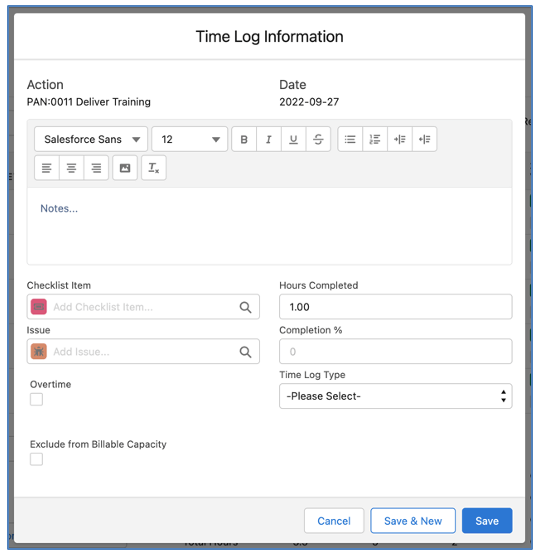
If you need to create multiple Time Logs for the same Action / Day, you can click the ‘Save & New’ button. For example, you may need to create a 2 hour Time Log with a Time Log Type of ‘Admin’ and a 1 hour Time Log with a Time Log Type of ‘Meetings’.
When a cell on the Timesheet has existing Time Logs and you increase the number to log more time, you will have the option to associated that additional time to one of the existing Time Logs or to create a new Time Log, as shown below.

To associate the additional time to an existing Time Log, select the Time Log you want to add the time to. Alternatively, to create a new Time Log, click the ‘Add New’ button.
If you need to reduce hours for a Time Log that you have already created, you can reduce the number within the cell.
If the cell value is made up of multiple Time Logs, the Modal will appear, enabling you to select which Time Log you would like to apply the reduction to.
A number of minor enhancements have been made to various features. Each enhancement is detailed below.
The Add Action Component that is accessed via the Utility Bar and the Track Pad has been updated to enable customers to select which fields are available. This is controlled by a Field Set on the Action Object called ‘Add Action Component Fields’.
All existing fields on the Action Object are available for selection, excluding the following:
These fields are excluded from the Field Set as they will always appear on the Component by default.
The following fields are pre-selected within the Field Set and will be accessible from the Component.
If you wish to add Custom Fields or remove any of the above pre-selected fields, you can do so by editing the fields included within the Field Set.
A Validation Rule has been included on the Time Log Object to prevent the Hours Completed field being less than 0. If you do not wish to use this Validation Rule, you will need to set the Active field to FALSE.
A Validation Rule has been included on the Time Log Object to prevent a Time Log from being related to a Billing Event Item (e.g. by manually populating the Billing Event Item field on the Time Log) if the Billing Event that the Billing Event Item relates to has a Status of ‘Issued’. If you do not wish to use this Validation Rule, you will need to set the Active field to FALSE.
A Validation Rule has been included on the Time Log Object to prevent a Time Log’s ‘Hours Completed’ field from being modified if it relates to a Billing Event Item that relates to a Billing Event that has a Status of ‘Issued’. If you do not wish to use this Validation Rule, you will need to set the Active field to FALSE.
A Validation Rule has been included on the Time Log Object to prevent a Time Log’s ‘Hours Completed’ field from being increased if it relates to a Billing Event Item that relates to a Billing Event where the Deposit field is TRUE. If you do not wish to use this Validation Rule, you will need to set the Active field to FALSE.
This section includes details of any changes to existing fields as well as any new fields that have been added to the solution as part of this release.
IMPORTANT: We recommend you add these fields to your Page Layouts. If you are not using the Permission Sets included with Mission Control, we recommend you check the Field Level Security for all of these fields to ensure all appropriate Profiles/Permission Sets have the required access.
Project
| Field | Field Type | Comments |
| Billing Type | Picklist | Existing Field requires the following value to be added:
Deposit to T&M |
Billing Event
| Field | Field Type | Comments |
| Deposit | Checkbox | Set this field to TRUE if this Billing Event is a Deposit Invoice for a Project that is using the ‘Deposit to T&M’ Billing Type |
Risk
| Field | Field Type | Comments |
| Probability Rating | Picklist | Existing Field requires the following values to be added:
Very High Very Low
Set the order of the values as below:
Very High High Medium Low Very Low |
| Impact Rating | Picklist | Existing Field requires the following values to be added:
Very High Very Low
Set the order of the values as below:
Very High High Medium Low Very Low |
| Probability Score | Formula (Number) | Existing Field – the formula has been modified
Old Formula: Case(amc__Probability_Rating__c, “High”, 3, “Medium”, 2, “Low”, 1, 0)
New Formula: Case(amc__Probability_Rating__c, “Very High”, 5, “High”, 4, “Medium”, 3, “Low”, 2, “Very Low”, 1, 0) |
| Impact Score | Formula (Number) | Existing Field – the formula has been modified
Old Formula: Case(amc__Impact_Rating__c, “High”, 3, “Medium”, 2, “Low”, 1, 0)
New Formula: Case(amc__Impact_Rating__c, “Very High”, 5, “High”, 4, “Medium”, 3, “Low”, 2, “Very Low”, 1, 0) |
Contributor
| Field | Field Type | Comments |
| Exclude from Timesheet | Checkbox | Prevents Actions from appearing on the Timesheet for this Contributor |
| Exclude from Timesheet Indicator | Formula (Checkbox) | Prevents Actions from appearing on the Timesheet for this Contributor |
| Start Date | Date | Identifies the Start Date of the Contributors involvement in the Action |
| End Date | Date | Identifies the End Date of the Contributors involvement in the Action |
How do I upgrade?
Mission Control will be made available based on the following release schedule.
14th October 2022 – Available for manual upgrade from the AppExchange
22nd October 2022 – Automatic upgrade to all Sandbox Orgs
29th October 2022 – Automatic upgrade to all Production Orgs
To manually upgrade to the new version of Mission Control in your organisation, please follow the steps below:
What’s New Webinar
We have pre-recorded the ‘What’s New’ webinar to provide further information on how to get the best out of the new features. To access this webinar, please view the ‘Release Notes’ section of the Mission Control Support Centre – www.aprika.com/mc-support
Feedback
Some of the new features included in this release of Mission Control have come from ideas submitted from existing clients. If you have an idea for enhancing Mission Control, you can submit it via email to [email protected].
Questions?
If you have any questions regarding this release notification, please do not hesitate to contact us at [email protected].
